Psst! You there! Yes, you. Does blow-drying leave you befuddled? Do you always lust over the silkiness of freshly blow-dried hair? Does your heart ache over the playful bounciness of blow-dried waviness? Well, say goodbye to blow-drying woes because boy, do I have something for you! A beginners’ guide to blow-drying your hair to perfection!
It is now time for you to become the blow-drying Goddess! *applause*
How to blow dry your hair like a pro
There’s something really sexy about beautiful, silky blow-dried hair. You know the kinda hair you see in these hair care commercials? The ones that make you wonder what the hell is IN that shampoo?! The ones that make you want to eat your heart out? I’m going to stop now. You get the picture. Here’s how to get them:

Image Courtesy: images.worldnow.com
How to blow dry your hair wavy
Remember that scene from Friends when Ross and Monica’s gorgeous cousin Cassie (played by Denise Richards) visits and whips her flowing wavy hair around in slow motion like one of ‘em lifesavers in Baywatch? Yeah, you know what I’m talking about! To get that kind of wavy hair, here’s what you need to do:

Image Courtesy: 4.bp.blogspot.com
How to blow dry your hair straight
Straight hair is sleek and classy and if you want poker straight hair, here’s how to blow-dry can help:
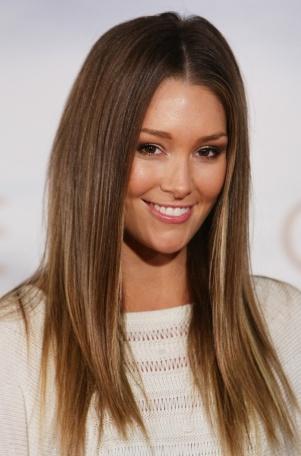
Image Courtesy: hairpediaclub.com
Author Bio: Who am I? I’m Kathleen Case and in my beauty salon i make people pretty. With the help of a fine education provided by Marinello.com. I’m able to make the people of the world beautiful one face at a time. I have collected the experiences I have gained perfecting every face I work on and using all that information, I write about beauty in all its forms to help the people I cannot reach with my own hands.
It is now time for you to become the blow-drying Goddess! *applause*
How to blow dry your hair like a pro
There’s something really sexy about beautiful, silky blow-dried hair. You know the kinda hair you see in these hair care commercials? The ones that make you wonder what the hell is IN that shampoo?! The ones that make you want to eat your heart out? I’m going to stop now. You get the picture. Here’s how to get them:
- Pat dry wet hair till it’s about 70 percent dry. Don’t rub as it causes frizzy hair. Rub a nickel-sized amount of hair serum onto your hair starting from the middle to end and spray with a heat protectant
- Your hair is now prepped for the blow dry! Blow drying is most effective when you section off your hair with hair clips.
- Set your blow-dryer settings to medium. If the temperature is too hot, it could damage your hair. Take one section of hair and wrap it around a ceramic hair brush. Begin blow-drying your hair, making sure the nozzle is pointed downwards. This eliminates frizz and keeps your hair slick and smooth.
- Once your blow-dry is complete, slick some hairspray onto your hands and run it through your hair to prevent flyaways and you’re done!
Image Courtesy: images.worldnow.com
How to blow dry your hair wavy
Remember that scene from Friends when Ross and Monica’s gorgeous cousin Cassie (played by Denise Richards) visits and whips her flowing wavy hair around in slow motion like one of ‘em lifesavers in Baywatch? Yeah, you know what I’m talking about! To get that kind of wavy hair, here’s what you need to do:
- You’ll need 3 kinds of brushes- a big ceramic brush, a medium ceramic brush and a small ceramic brush; hair clips to pin your hair as you go and of course, a blow-dryer.
- Start with damp hair- not too wet, not too dry. Prep your hair as I showed you and then section off your hair into 3 sections- right, left and bangs.
- Start with one section of hair. Free up a tiny section of hair at the bottom (closest to your nape) and clip away the rest.
- Blow dry the hair straight with the big brush. Then with a small brush wrap the bottom ends of this hair around it away from the face. Blow dry this hair. Hold for a few seconds and then release. Repeat with the rest of the hair.
- If you have bangs, use the medium brush to first blow dry your bangs toward your face and then away from your face. And then blow dry your bangs to one side. Run your fingers through them.
- Rub 3 drops of Argan oil to your hair to give it a shine and spritz your hair with some hair spray and you’re done!
Image Courtesy: 4.bp.blogspot.com
How to blow dry your hair straight
Straight hair is sleek and classy and if you want poker straight hair, here’s how to blow-dry can help:
- Apply a drop of leave-in conditioner to the ends of your damp hair. If your hair is fine, you should skip this step.
- You’ll need the same 3 ceramic brushes- big, medium and small. Section off your hair into 3 sections the same way as you did for wavy hair.
- Take the bottom section of hair and wrap it around your big brush. Quick tip- roll your brush as you blow-dry your way down the section of hair. This makes the hair a lot sleeker.
- You need to hold the nozzle closest to your hair on the highest heat setting as you roll your way down.
- Then you take the same section of hair and place your brush over the hair. Place the blow dryer under your hair and work your way up this time. Repeat for every section of your hair.
- For tiny hairs around your temple and over your ears, wrap your hair around your tiny brush and blow dry it the same way.
- Blow your bangs the same way as you did while blow drying your hair for wavy hair.
- Rub a drop of argon oil through your hair just to evenly distribute the oil evenly. And it’s done!
Image Courtesy: hairpediaclub.com
Author Bio: Who am I? I’m Kathleen Case and in my beauty salon i make people pretty. With the help of a fine education provided by Marinello.com. I’m able to make the people of the world beautiful one face at a time. I have collected the experiences I have gained perfecting every face I work on and using all that information, I write about beauty in all its forms to help the people I cannot reach with my own hands.
Comments
Post a Comment
Comments posted on this blog are moderated and approved only if they are relevant, on-topic and not abusive. Avoid using links to your site/blog in the body of your comment unless it is highly relevant to the post.